Homebrew #13: Flaming Hessian
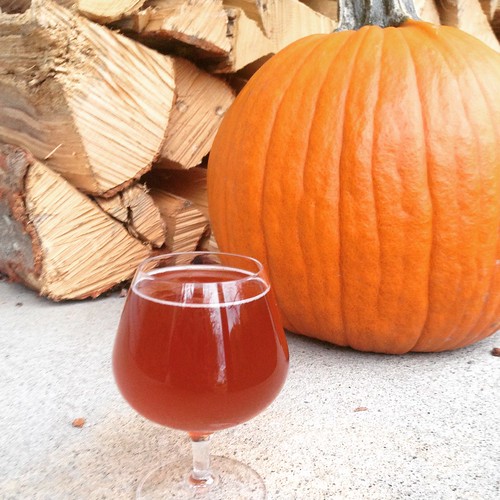
¶ by Rob FrieselHomebrew session #13 was an experiment on all fronts. How to create a novel take an oft-loved-yet-also-oft-derided seasonal variety? I’m talking of course about the Halloween pumpkin beer, but figured why not add a little chili heat? Thus was born Flaming Hessian, the fourth Tilde Gravitywerks original:
This beer’s story begins one summer night, by the pool, during a party, while I chatted with my friend about this homebrewing hobby I’d picked up. I never meant to invent this recipe. I never meant to drag him into it. He just said he might like to brew with me some time. He just said that his wife liked pumpkin beers. And everyone at the party had started idly speculating about what fun it would be to have a big ol’ Halloween party on our block. This led to all of those conversational threads tangling up and I just couldn’t resist the urge to get creative.
That was how we got it in our heads to make a chili-pumpkin beer.
And I did a little research.
My first instinct was to crib from NortherBrewer.com’s Smashing Pumpkin recipe; and/but while their video about using real pumpkin was useful, I also didn’t want to use a kit this time around. I read through some threads on HomeBrewTalk.com (here, here, and here), and then this bit from SILive.com, these “tips from the pros”, the American Homebrewers Association’s article on designing pumpkin beers, and a couple recipes (here and here). Eventually I had enough ideas that I was able to put something together on my own.
This brew represented three firsts for me:
- First time using a yeast starter;
- First time brewing with a partial mash; and
- First time cooling with a wort chiller.
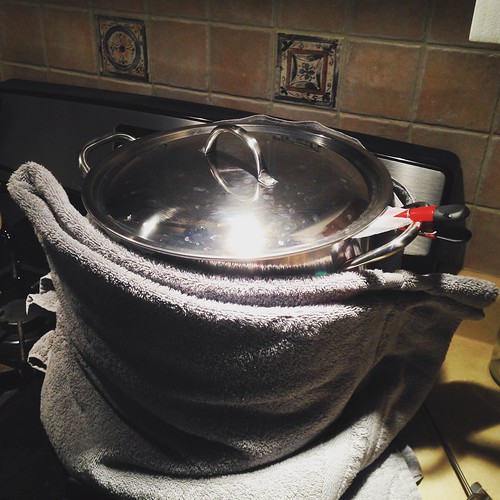
Brew day came the second Saturday in September. My friend came over and, ingredients and equipment all arranged on the counter, we dove in. We collected and heated the water for the mini-mash and talked through the rest of the steps while we waited for the thermometer to hit 160°F.
Two things that I quickly realized about partial mash. First: the essential basics of mashing are actually not all that difficult and I really don’t know why I’d made it out to be this arcane process in my imagination. Second: you’re really better off by not fussing with things while the mash is going on. 1 I made the mistake of taking the temperature of the mash three times in the first ten minutes, thus accidentally allowing the temperature to drop below 150°F briefly. (And then heating it up almost too much afterward while trying to recover from that first mistake. 2)
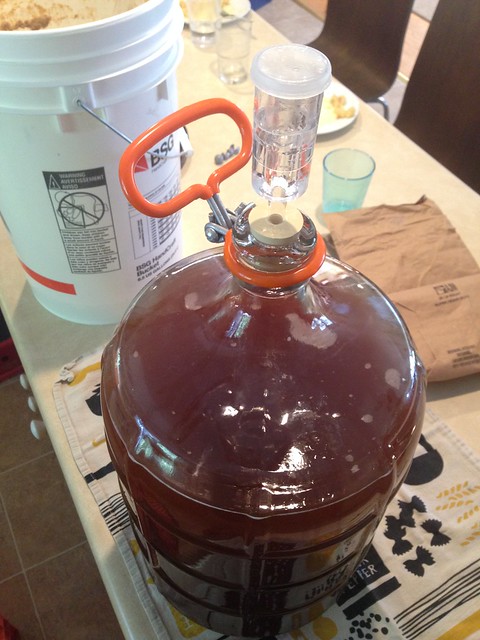
All in all, the partial mash was a success. We had a starter wort 3 with 3.2%Br to work with, and we set that to boiling. We added our extracts, brought it back to boiling, and dropped in our hops. With ten minutes to go, toss in some Irish Moss. 4 With five minutes to go, some allspice and cinnamon. Once the boil was complete, we activated the wort chiller.
Now, a brief aside on the immersion wort chiller: somewhere in the first couple months of homebrewing, someone had told me that a wort chiller wouldn’t really help me out all that much. That I would be just fine with ice baths. I wish I could remember who that was, because I would never take advice from this person ever again. The chiller brought the wort temperature down from boiling to about 72°F in 25 minutes and change. 5 That’s about 30°F cooler in about half the time as the ice bath method I’d been using up to this point. I’m a convert on the wort chiller. Completely sold. If you don’t own one, go out and buy one now. 6
The rest was rote: 2 gallons of top-off water into the fermenter, pour wort over, top-off a little bit more, and aerate. Gravity readings. (13.2%Br, 1.054 S.G.) Temperature readings. (72°F.) And pitch. (Approx. 138 billion cells.) Into the basement it goes.
Fermentation starts promptly. 7 Fast forward about two weeks and we racked. Color was good, flavor was… allspicy.
Fast forward another week: time to add some more flavor! We split and seeded 8 a vanilla bean, and then likewise split and seeded a chili pepper. 9 Those two items got soaked in vodka for 20 minutes and then…
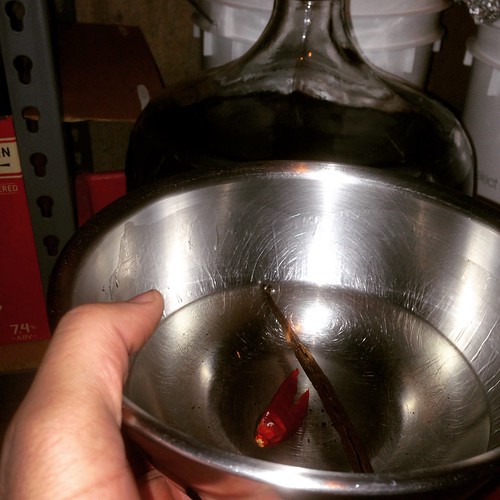
…boom! Added to the beer. 10 Let those soak for another week or so and then bottling day…
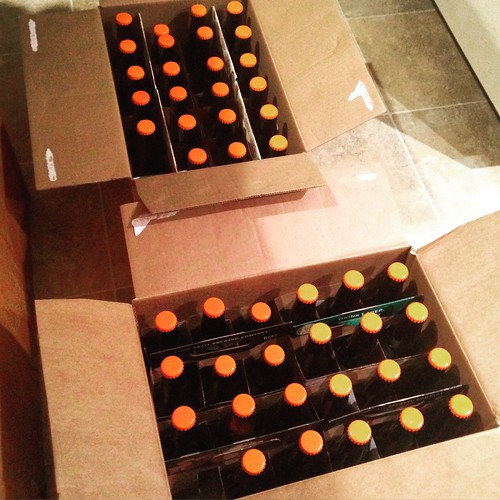
Wherein we packaged 46 × 12 oz. bottles of Flaming Hessian. The preliminary taste test (from the bottling bucket dregs and hydrometer sample) were… a little underwhelming. It had the body of a pumpkin beer, but the most prominent flavor was the allspice; the cinnamon and vanilla were nigh undetectable, and although there was some chili heat, it was definitely mild. 11 (Not that I wanted to over-do it but…)
We gave it two weeks or so to carbonate and bottle condition and then…
The results were… Well, they weren’t quite what I was going for. As with the bottling day sampler, the chili (for example) was present, but subtle; not as much heat as I was going for, but I suppose it’s better to err on the mild side here. The pumpkin adds some nice body to the beer, but it’s true what they say: almost no flavor from the gourd itself. The biggest flavor note is from the allspice, with the cinnamon providing some back-up. The vanilla is hardly there at all. Overall, a bit of a disappointment, but the feedback I’ve gotten from friends etc. has been largely positive. “Well-balanced, and not bad for a pumpkin beer.”
I’ll happily accept that compliment.
Recipe
The partial mash recipe for Flaming Hessian is as follows.
Mash Grains
- 2 lb. 6-row malt
- 2 lb. pumpkin flesh
Fermentables
- 4 lb. Amber DME
- 1 lb. Wheat LME
Hop Schedule
- 1 oz. Cluster (60 min.)
Spices
- approx. 3 Tbsp. Allspice
- approx. 3 Tbsp. Cinnamon (stick)
- 1 vanilla bean (for secondary)
- 1 Aji Amarillo Pepper (for secondary)
Yeast
- Wyeast 1056
Prepare a 1 liter starter 2-3 days before brew day.
Brew Day
- Collect 12.5 qt. (approx. 3 gal.) water and heat to 160°F. Add 2 lb. crushed 6-row and 2 lb. pumpkin to filter bag and add to water. Hold at 150°F for 1 hour.
- After 1 hour, remove filter bag from water. Squeeze filter bag to extract as much liquid as possible for wort.
- Bring mini-mash to a boil. Add fermentables and return to boil. Add 1 oz. Cluster hops.
- Boil for 60 minutes. Add allspice and cinnamon with 5 minutes remaining.
- Cool to 70°F as rapidly as possible and top off the fermenter to reach 5 gal.
- Aerate wort and pitch Wyeast 1056 yeast from starter.
Beyond Brew Day
- After fermentation completes, rack to a carboy.
- Allow beer to condition for approx. 2 weeks.
- Approximately 5 days before bottling, split the vanilla bean and add to carboy. Also split and seed the chili pepper and add to carboy.
- Corn sugar to carbonate on bottling day.
- Allow at least 2 weeks to carbonate.
- Enjoy.
Details
Flaming Hessian, an original chili-pumpkin ale by Tilde Gravitywerks
| Original Gravity | 1.053 (13.2%Br) |
| Final Gravity | 1.010 (6.4%Br) |
| ABV | 5.6% |
| Attenuation | 80.3% |
| IBU | 15.6 |
| SRM | 8.7 |
| Links | Untappd Flickr |
- A say this as a newbie to the mashing process, but it seems to me that, as with most things in homebrewing, you’re better off doing nothing unless you know what you’re doing. Which isn’t to say that someday I won’t be posting here about fiddling with Mg+2 levels or pH or temperatures. But my advice to anyone else trying this for the first time: do as little fidgeting with the gear and ingredients as possible![↩]
- Tl;dr: as mentioned in the previous footnote, it’s better to just not mess with things if you can help it. It dropped to under 150°F and then I hit it with some more heat from the burner and then it was pushing 164°F and so I hit it with ½ quart of cold water and while the temp was fine who knows maybe that’s why my gravity was off by 0.001?[↩]
- Not to be confused with the starter wort for the yeast starter, which I totally skipped that part of the story but there’s really not all that much to tell. I kind of just followed these instructions and that was that.[↩]
- I was going to throw in my “isn’t Irish Moss just a placebo?” rant here, but I already did that last time. Anyway… I hardly needed to clean the brew pot this time around.[↩]
- Most of the ice baths I’ve done in the past have required about 4 gallons worth of ice, plus a sink full of cold water, to get the wort cooled to about 100°F (per the kit recipes) before adding the cold top-off water with the assumption that we would end up less than 80°F and within band for pitching temperatures. But those ice baths took 30-45 minutes on average, and sometimes much longer.[↩]
- Yes, that’s the model I own. No, I don’t get a kick back. Yes, I’m still recommending it.[↩]
- By +17 hours the airlock is ticking along rather aggressively.[↩]
- I say that we seeded it but the truth is… once it was split, I didn’t really see any seeds to remove.[↩]
- We’d been looking for an Aji Amarillo pepper, but weren’t able to track one down. We settled on a dried red (generic) chili pepper that we had. On some level I wish we’d found the exact pepper variety that we’d been looking for, but since we were just going for heat… well, it’s hard to know how much of a mistake that was.[↩]
- Vodka was not added to the beer.[↩]
- To be fair, I was trying to apply the lesson I’d learned after two rounds of Honestatis. In that instance, I was cautioned to play it conservative with the cherry-smoked malt; and while I did, it also came out assertive enough that I was pleased. (Albeit, not so much that I didn’t decide against upping the proportion on the next batch.) Everything I’d read, and everything I’d been told, and all of my instincts said the same thing: play it conservative with strong flavors, or else you might regret it.[↩]
About Rob Friesel
Software engineer by day. Science fiction writer by night. Weekend homebrewer, beer educator at Black Flannel, and Certified Cicerone. Author of The PhantomJS Cookbook and a short story in Please Do Not Remove. View all posts by Rob Friesel →3 Responses to Homebrew #13: Flaming Hessian
Pingback: Homebrew #14: Acer Square | found drama
Pingback: Homebrew #19: Professor Severus Snape’s “Dragon Cloak” Malevolent Wizard Stout | found drama
Leave a Reply